Fans will love these DIY Harry Potter Wands! They light up making the ultimate wizard prop. This Harry Potter craft will bring out your creative wizard. Follow our instructions to make a one-of-a-kind wand that glows! Just imagine the spells you’ll be able to cast. Lumos!
This post was originally published on October 17, 2017. It was updated on September 28, 2020 with a new craft template.
If you’ve read my post on how to make a tombstone prop, you know that both Kevin and I have a background in theatre. We met back in the summer of 1996 as interns at the Goodspeed Opera House, a time that seems eons away now.
Many things have changed…we are older, grayer, and have new careers. But we still have a deep and abiding love for all things theatrical!
When we talked about possible Harry Potter crafts, wands were an obvious choice. You can dress an actor in Hogwarts robes but no one will believe he’s a wizard unless he has some killer props!
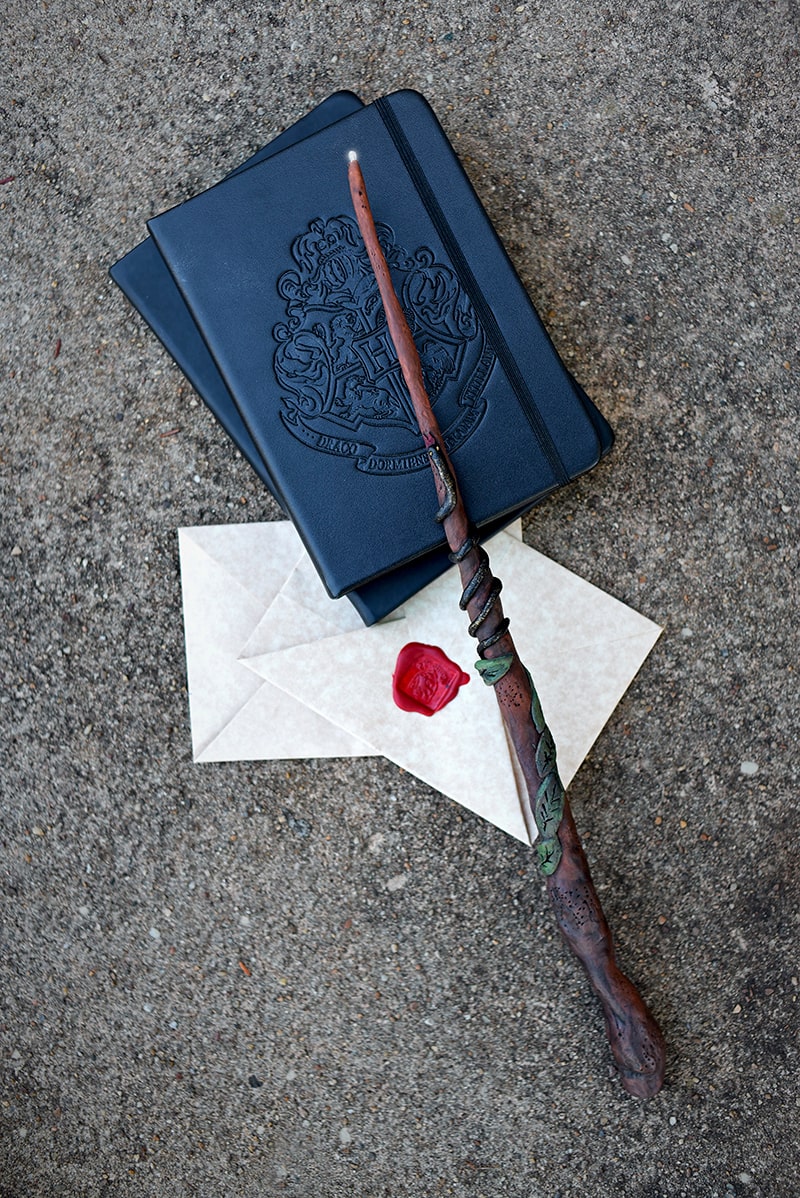
So, fellow Harry Potter fans, whether you’re a Gryffindor or a Slytherin, this ultimate DIY Harry Potter Wands tutorial is for you!
Why is it the ultimate tutorial? Because they light up, of course! But also because this craft is inspired by a very memorable Halloween.
Let’s grab a mug of butterbeer and I’ll tell you why making lighted wands is so near and dear to my heart!
Light up wand
When I was about 6 or 7, my parents collaborated on a witch costume. My mom, never one to go with the obvious option, chose a black fabric with orange stars and sewed it together on her vintage Singer. My dad, always the tinkerer, fashioned a light up wand from a brass tube.
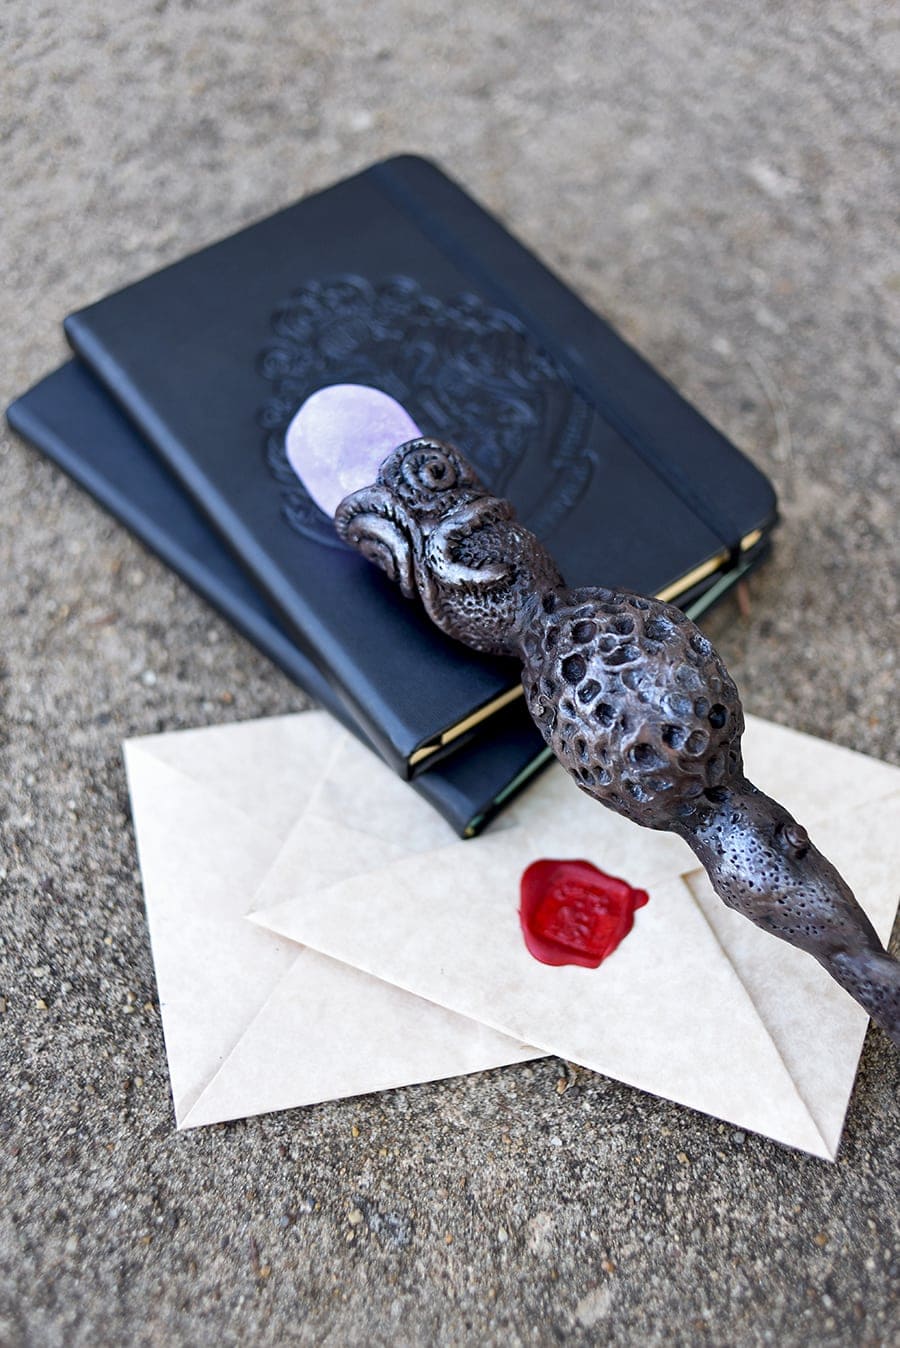
To my childish delight, the wand had an orange crystal at the end that lit up. I remember feeling so special in that starry tunic, swirling in circles as an ember glowed around me.
It was magical in a way only things of youth can be…the feeling of being unencumbered and giddy mixed with the power of imagination. To this day, it is one of my happiest childhood memories.
LED light craft
I want to spread that joy! To that end, Kevin and I sat down over the summer to figure out how to make these LED light craft wand. It started with a few dollar store flashlights and a few hours of frustration.
Although it was a thrifty concept, it was nearly impossible to add a wire to an LED bulb (most mini flashlights have a bulb that connects directly to the battery). Let’s not even get started on the switches.
At the end of a very disappointing night, I had one dowel wired, but it took scavenging parts from various flashlights and I wasn’t sure the switch could be camouflaged.
We needed a prewired bulb and a switch that was inconspicuous. Most importantly, this craft had to be achievable for those without a degree in theatre! LOL!
So, Kevin talked to some friends to figure out how and where to buy supplies. Luckily, he knows a lot of people that are into miniatures.
The right supplies in hand, we got our dowels wired. The next hurdle was making them look like wands. I have seen TONS of tutorials that use hot glue as the primary way to make Harry Potter wands.
Don’t get me wrong, I love my hot glue gun, but this sounds unsafe to me. I have a scar from high school art class that proves it.
Air dry clay project
On a craft store run, I purchased oven bake clay, and when it came time to make the wands, I realized that baking a battery was a stupid idea. Another trip to the craft store and we were back in business with this air dry clay project.
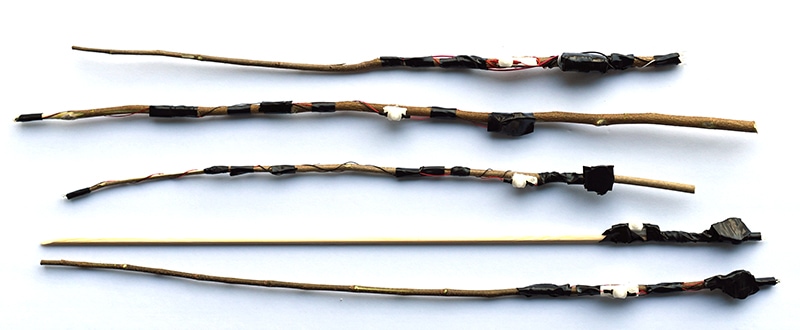
Much smarter choice! But there were more lessons to be learned. Air dry clay is WET! So, one of my first two test wands failed because we neglected to completely protect the battery component.
As the clay dried, a distinctive rust pattern started to emerge and the battery went dead. With the next batch of wands we completely wrapped the batteries with electrical tape.
But then as were covering the next batch of wands with clay, the ones lit in the back with a rock started to turn on by themselves.
Very frustrating, but I wasn’t going to let this project defeat me! I pulled off the clay around the switch and the power turned off.
Clay is wet…water conducts electricity…so let’s just say this craft is not completely hot glue gun free.
Electrical tape is bulky, so I covered the area surrounding the switch with hot glue. Once it cooled, we finished decorating the wands with the air dry clay. I’m happy to say that was the end of the electrical mishaps!
See how well they light up? It was worth all the learning curves to bring you this tutorial!
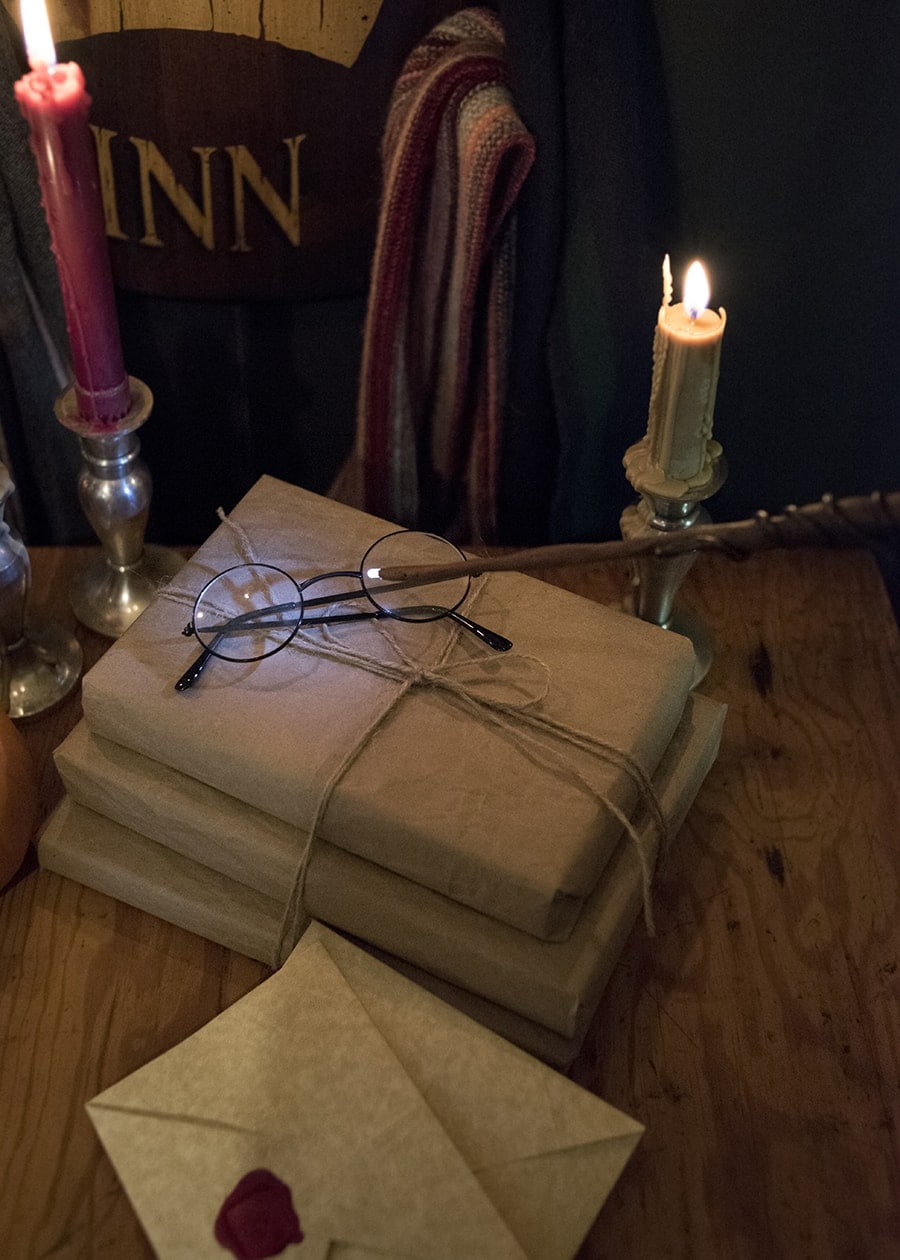
Don’t forget the Wand-Lighting Charm is simple, but requires concentration. Hold your wand in your dominate hand and say “Lumos!” The counter- spell to extinguish the light is the charm “Nox!”
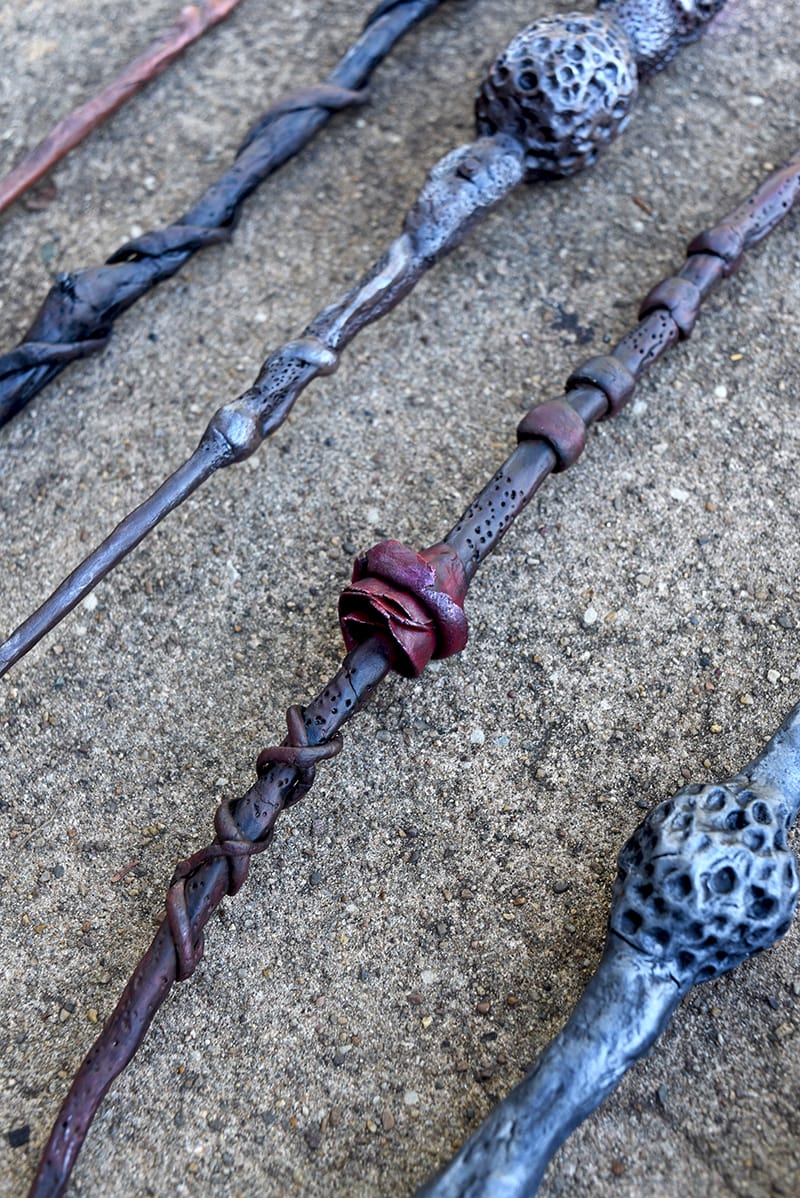
Harry Potter light up wand
But that being said, this is the theatrical, impress everyone at your Halloween party prop! Not because the Harry Potter light up wand is a difficult craft, but because you have to have some patience.
It takes about two to three days for the clay to dry but since we use a limited amount of hot glue, you’ll save yourself the burns!
Of the whole process, shaping the clay was the most fun part for me. It’s where you turn a stick into an instrument of magic!
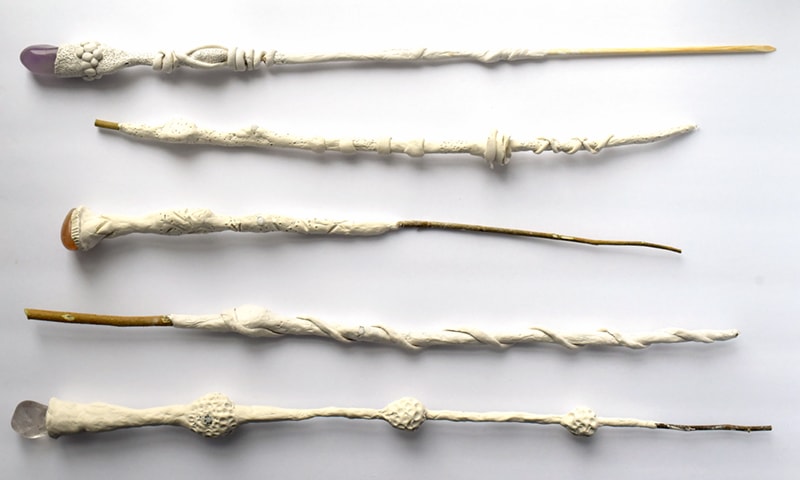
I found it easiest to go with the flow. Because of the electrical components, the clay naturally bumps and swirls. I used that to my advantage by incorporating them into my design. Texture is where it’s at, so I stippled and grooved the clay into an interesting design.
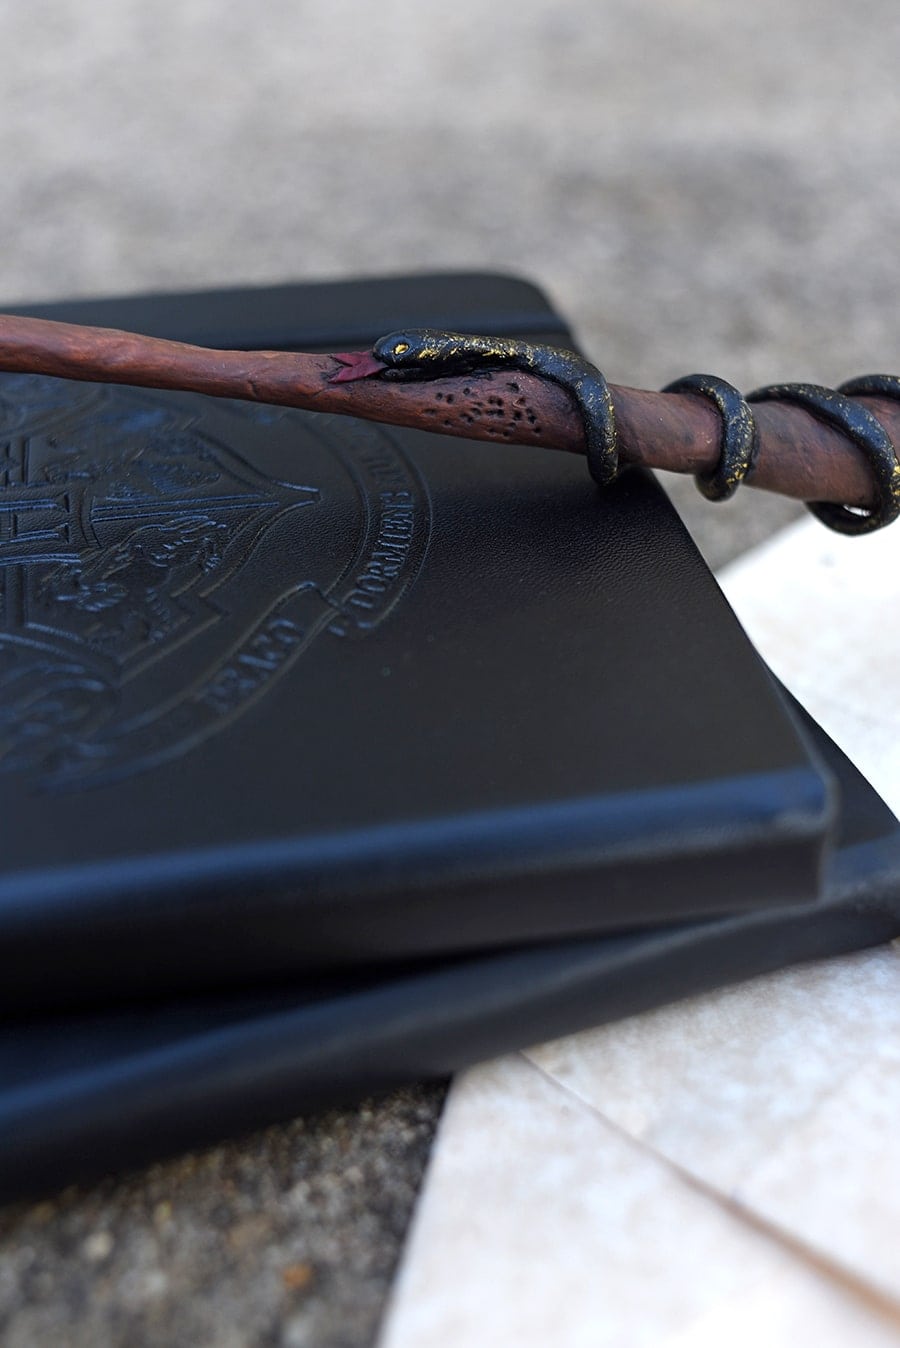
Once the whole stick was covered in clay, I added elements like leaves, vines and balls to the wands.
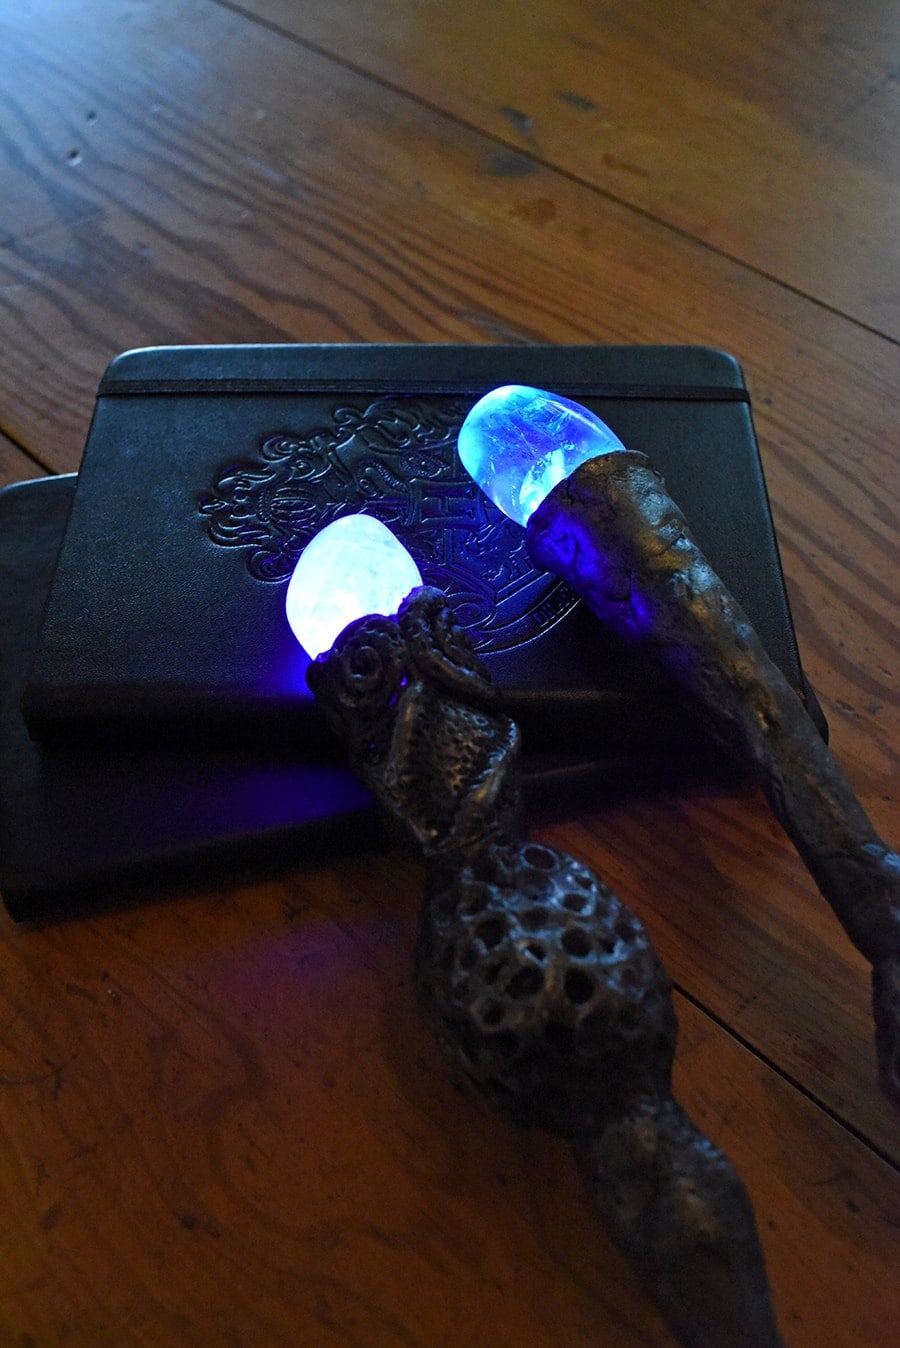
Then you wait… if you’re like me you’ll want to keep checking on the wands but trust me, let them dry a long time! I disassembled the wand that was a dud, only to find it was dry on the outside and wet on the inside.
So you don’t want to paint them until they are super dry!
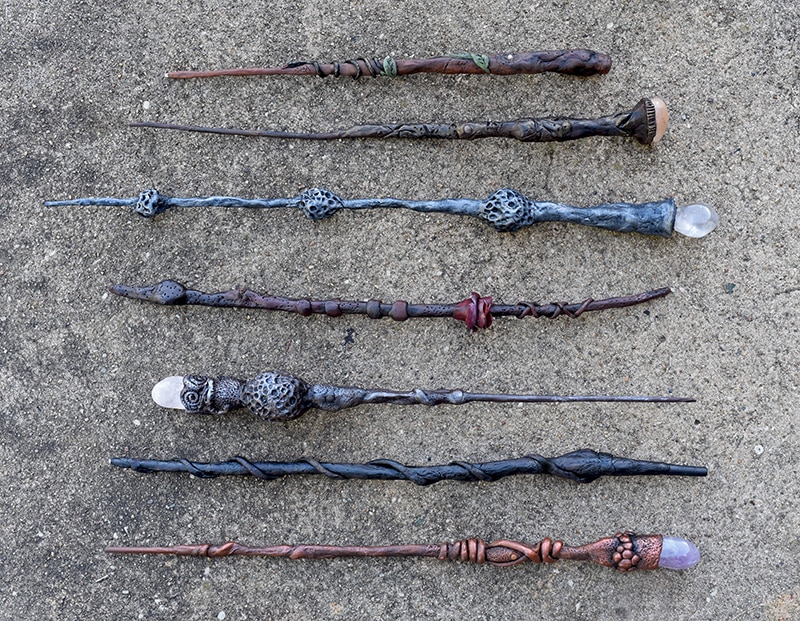
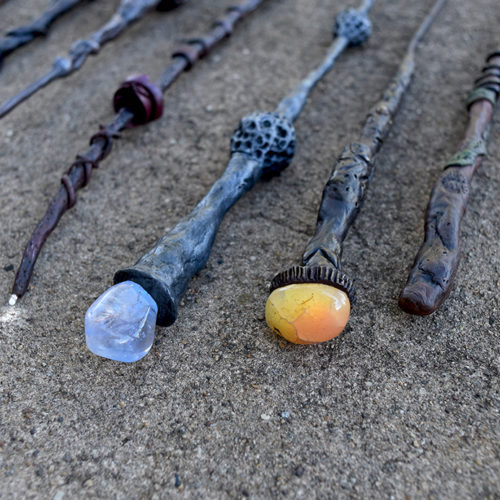
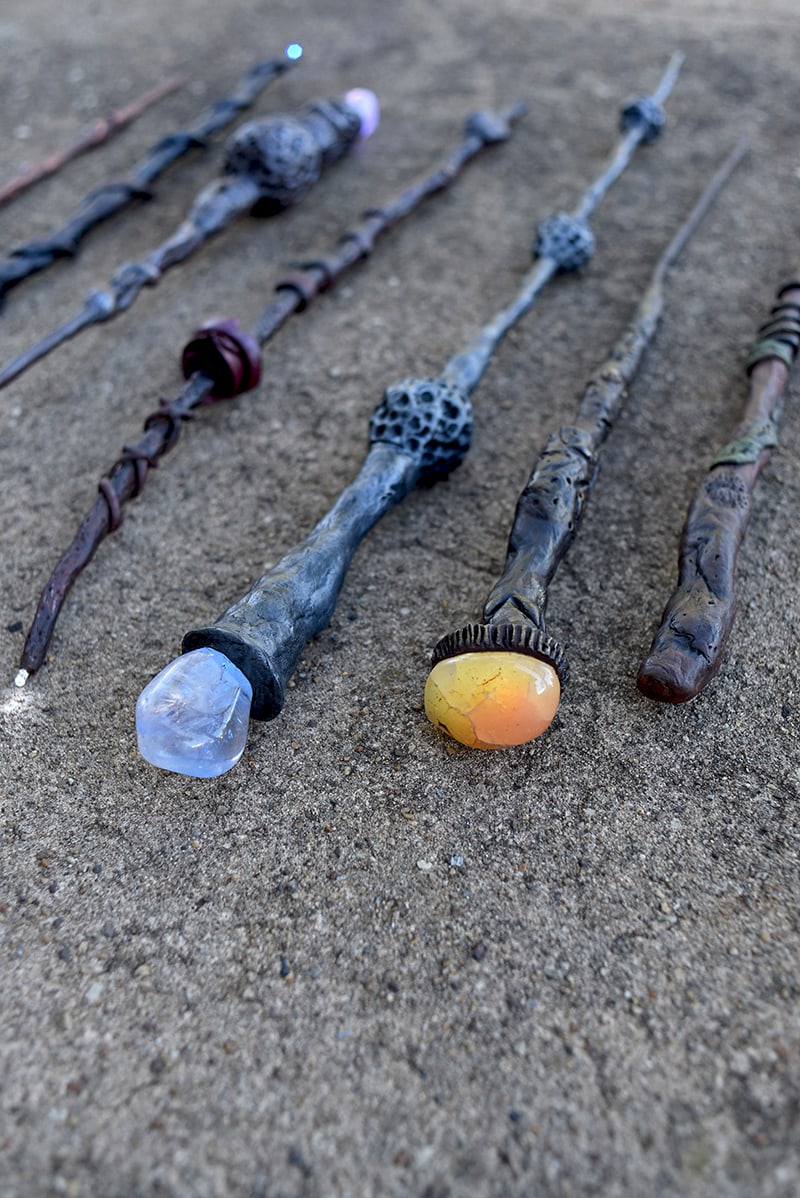
When the clay was dry it was time to finish the wands with a few coats of paint. We went with a more natural look for our DIY Harry Potter Wands, using mostly browns, black and metallics, but the sky’s the limit!
Paint choice is as personal as your wand design. That’s the beauty of this craft! You can really make it your own. See how no two are alike?
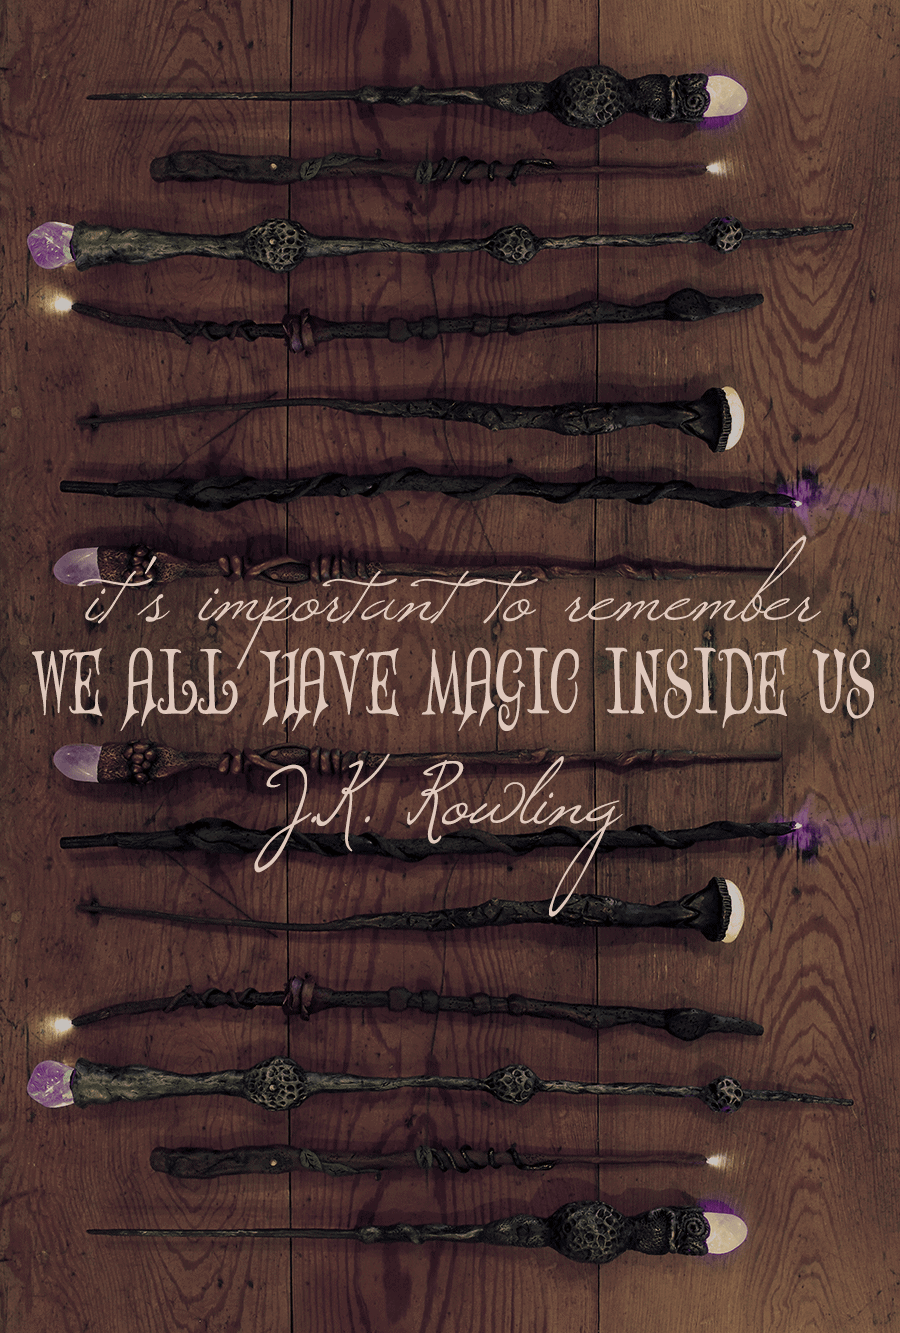
Now it’s your turn! You can safely make these illuminated DIY Harry Potter wands learning from my mistakes so it’s all fun and no frustration! Scroll down to get the tutorial and my tips and tricks. Also be sure to check out our Harry Potter #diydatenight for more wizarding fun!

Wand tutorial pictures
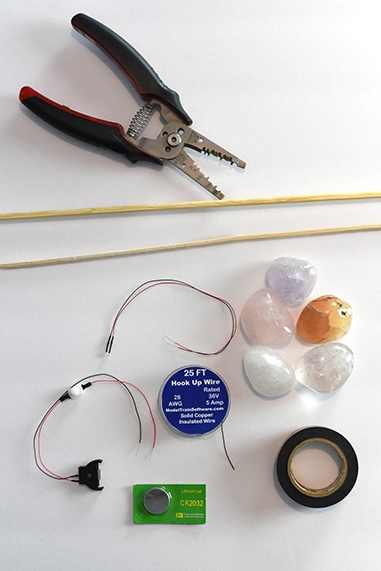
DIY Harry Potter Wands
Equipment
- Hot glue gun
- Glue sticks
- Small piece of cardboard or foam core
- Super glue
- Saw or garden clippers
- Sand paper
- Paint brushes
- Tools to shape clay (knife, toothpicks, small piece of dowel to roll out clay…. whatever you have around)
Supplies
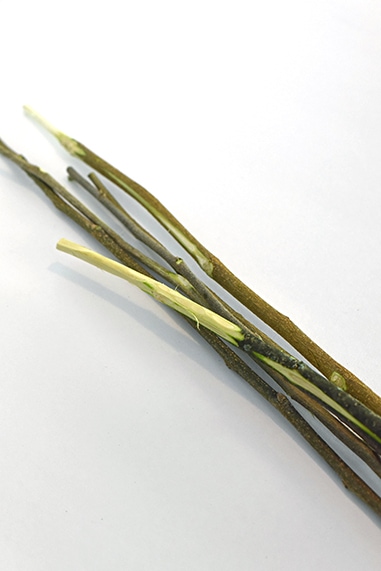
- Sticks (dowels or sturdy twigs about ¼- 3/8th inch thick)
- Styrofoam (leftover packaging materials are fine…the thicker the better)
Electrical
- 3 volt 1.8mm LED bulbs (choose the 8 inch wire for a light at the back of the wand and the 14 inch for the light at the front)
- 3 volt coin cell holder with switch
- Hook up wire (just in case your wires aren’t long enough)
- Electrical Tape
Decorative Elements
- Large rocks (I ordered these from Amazon. Some were translucent, some were not, they were all very pretty)
- Acrylic craft paint
Air dry clay (we tried Two)
- Creative Paperclay was easy to sculpt but results in a lightweight wand
- DAS Air Hardening Modeling Clay was not as easy to sculpt but had a better feel once dry. I also prefered the way DAS took paint
Instructions
- Plug in glue gun
- Cut dowels or sticks to be two inches longer than the desired length
- Determine if you want your light at the front or the back of the wand
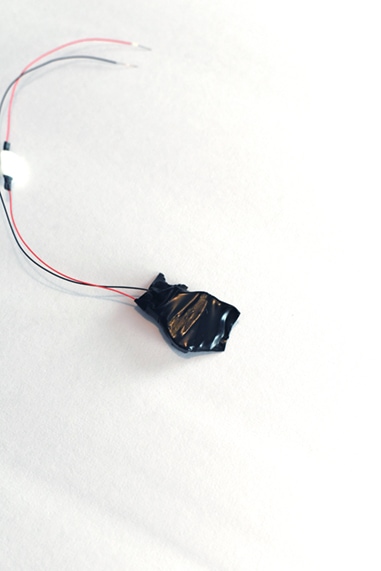
- Insert battery into holder and completely cover in electrical tape
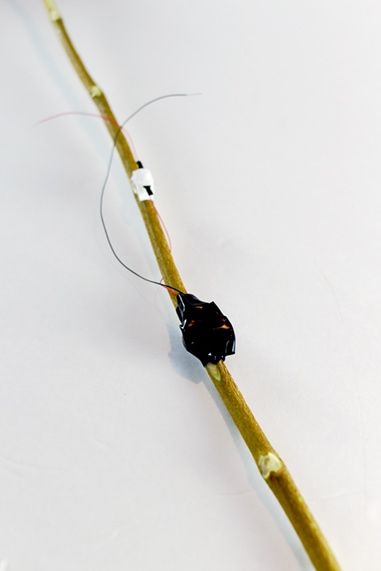
- Attach the battery pack to one end of the stick. If you want to light a rock at the back of the wand, place it about one inch from the end. If you’d like the tip of the wand to illuminate, place the battery pack about three inches in
- Decide where you want your switch. We found it natural to place the battery pack where the palm of the hand would naturally go and the switch where the thumb could easily reach it
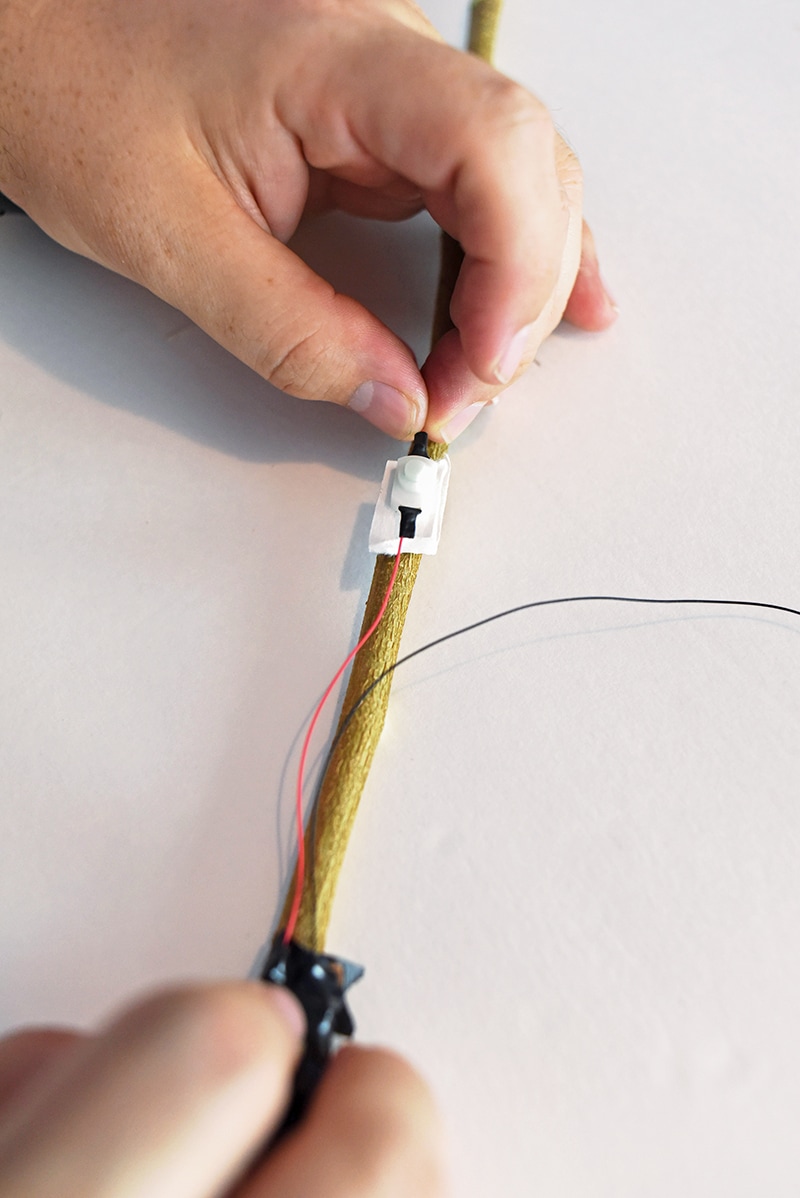
- Cut a couple small pieces of foam core or cardboard to the width of the wand and hot glue them to the stick where you plan to place the switch. You want the switch to be at about the same height as the battery pack or a little taller
- Hot glue the switch to the foam core
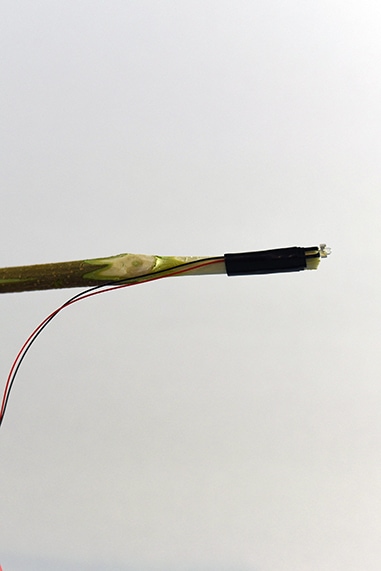
- Tape the LED light to the stick, letting the bulb stick off the end a little.
- Connect wires, usually red to red, black to black, but if the colors don’t match up, make sure to test connection before moving on to the next step.
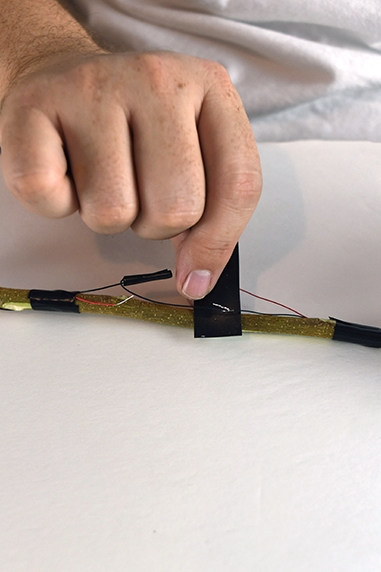
- Cover all of the wire and electrical pieces with tape, only leaving the switch exposed.
- Cover the area surrounding the switch completely with hot glue. Make sure to not get hot glue on the the top of the switch or it won’t operate. (This is to protect the wire connections from the moisture in the clay).
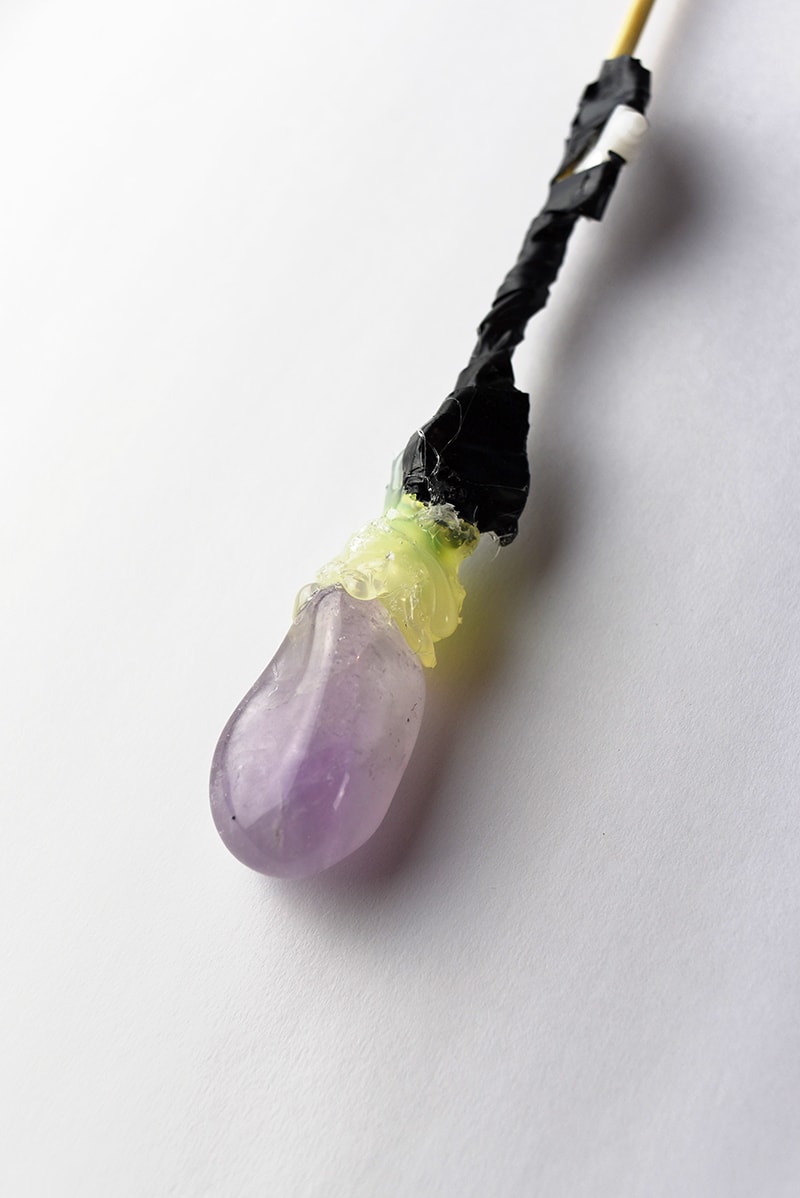
- If you’ve chosen to light the back of the wand with the lighted rock, place the rock in a bowl, or something else that holds it steady. Gently place the end of the wand to the rock (the LED end) and hot glue the rock in place. You’ll have to slowly add more glue until the rock is attached. If you’re using a polished rock, the glue is unlikely to hold it long term, so handle the wand with care.
- Cover your wand in clay leaving the switch exposed. It’s best to start with a thin coat and then add details. To smooth your clay out you can wet your hands a little, but since there are electrical components inside, use water sparingly. We found it best to go with the flow. The clay has a mind of its own, so try to work any bumps or twists into the design. Make sure to leave part of your stick exposed.
- Once you’re done covering your wand in clay, stick the exposed stick end into your styrofoam to let the clay dry. Be patient. It will take about 48-72 hours.
- Once the clay is dry, cut off the extra exposed part of the stick and sand smooth.
- Now you are ready to paint. Start with a couple of base coats and then use some darker and lighter colors to bring out the textures of the clay.
- If you’ve used a rock on the end of your wand and it’s come loose, reattach it with super glue.
- Once your wand is completely dry, you’re ready to perform magic spells!
Notes
- When the clay dries, it can shrink or crack a little bit. We found it easiest to fill in the gaps with hot glue.
- Test your rock for translucency before using it for your wand.
- If you want a brighter rock, you can wire two LED lights to the battery, but the battery will burn out twice as fast.
- As designed, the batteries are not replaceable. If you are making these for kids, we suggest you let them play with them for short bursts of time to make the fun last longer.
- We think this is a great project to make with older kids. Because of the electrical components, it’s too fragile for little ones to construct. Let them make their own without the electricity or have them paint a wand after the clay has dried.
- To disguise the the switch, dry brush on paint in very thin layers.
Some tutorials use chopsticks… they are not long enough for this project. Our finished wands ranged from 19-27 inches. - Our measurements were for adult wands. If you are delighting your little ones with wands, make a wand that will fit little hands.
Loved making these DIY wands? Try your hand at a few more crafts!
You Might Also Like:
Alcoholic Butterbeer
This boozy take on butterbeer will give you the feeling of being in the world of Harry Potter, but with an adult twist.
Christmas Gnome Craft
A fun project for kids and adults! Use these paper gnomes as gift tags, Christmas ornaments or make into a holiday garland.
Harry Potter Date Night
Can you imagine yourself cuddled up with your date at The Three Broomsticks? We’ve got a special date night planned for you.




Daniel Strange says
This is a great tutorial! My kids loved making their own wands!
Vintage Kitty says
That’s so awesome! I bet they’re the coolest wizards and witches on their block!
Kit says
These are so cool! I love how they light up – perfect for ‘Lumos’!
Vintage Kitty says
Thanks Kit! We had a lot of fun casting spells with them for sure!
Erika says
As a Harry Potter fan who always seems to pick out Voldemort’s wand when browsing wands at the ren faire (TMI? maybe) I’ve got to say these are gorgeous! I’m all thumbs when it comes to sculpting though. Do you have any tips or resources for those of us who struggle with respectable stick figures?
Vintage Kitty says
Hahaha! You’re not alone Erika. I think there’s a little evil in all of us ;-)
Great question. I’d say to start simple. With all the lumps and bumps of the electrical components, a shape will naturally emerge. You can enhance it by adding grooves and pits with a toothpick to mimic wood. I’d definitely go with the Creative Paperclay if you’re nervous about sculpting. It was much easier to work with. Once you get the hang of working the clay, you might surprise yourself and want to take things further by adding tendrils, leaves or other shapes.
Allison says
What an awesome idea! These are SO expensive at Universal Studios. Now you just have to figure out how to make them activate all of the cool interactive exhibits around the Harry Potter section of the theme park… ;)
Vintage Kitty says
Yeah, I’m still wondering how they do that. Guessing a chip of some sort. But yes, they’re expensive all right. Not sure it’s much cheaper making your own but it’s more personal. It’s cheaper if you do a bunch at once, so great for a family project or parties.
Kristen Roberts says
I’ve been crafting and building costumes for various events, games, and conventions for years, but I’ve never seen a tutorial so well laid out as this for a light-up prop. You’ve done an excellent job of demystifying the process, and yours look absolutely gorgeous.
Vintage Kitty says
I’m so glad you found the tutorial informative. I read so many posts before starting the wands and they all left me confused! I wasn’t able to get tons of pictures of the process, so was hoping a detailed explanation would make things clear.
Brynn says
This is so cool! I can’t wait until my kids gets a little bit older so I can introduce them to Harry Potter!
Vintage Kitty says
Thanks Brynn. Eleven is the age for first years at Hogwarts… but I hope you don’t make them wait that long!
Laurie says
I made similar light up wands for my sons Harry Potter and Ron Weasley costumes 2 years ago. Instead of air dry clay i used crayola model magic. Is extremely light weight, not wet at all and takes paint amazingly well and also it dries over night.
Kevin says
Laurie,
Thanks for the suggestion. We’ll give that a go next time we’re making wands for our nieces’ and nephew’s Halloween costumes!
Taerin says
Which brand (and how many colors) of paint did you use on the one the looks like iron? These are fantastic!
Vintage Kitty says
Hi Taerin! All the paints are acrylic craft paints. I’m not particular to one brand so I have quite a variety of brands. Not sure which ones are reading as iron but there are many thin layers of paint. I used several metallics, white, black, browns. Sometimes I’ll paint on a layer and wipe it off and sometimes I’ll dry brush on the paint.
It’s funny because I’ve had multiple teachers tell me I “overwork” my art…. but I stop when I’m happy. So I guess what I’m saying is, just go with your instincts and paint with as many colors and layers as you’d like. It’s just paint…
Hope this helps!
Julie says
So fun!
Vintage Kitty says
Aren’t they?!
Jaide says
I LOVE this! I can’t wait to make some wands!
Vintage Kitty says
I want to see your creations! Tag me!
Mallory Lanz says
These are so fun! Perfect for a Harry Potter lover!
Vintage Kitty says
Yes! But also cool for other costumes too!
Kristen says
What a perfect DIY for a Harry Potter Party
Vintage Kitty says
Yes, we need to host one to show them off!
Sarah says
Love the LED on these wands! magical.
Vintage Kitty says
Thanks Sarah!
Kimberly says
How cool are these?! My kids would love them!
Kevin says
Thanks Kimberly! They would!
Ejjc says
These wands are amazing. Do you sell them?
Vintage Kitty says
No, I’m sorry. They are fun to make!
Katerina says
I LOVE this!! Such a fantastic idea!!
Vintage Kitty says
Thanks Katerina!
Jocelyn says
Those are seriously the coolest homemade wands I have ever seen. I love all the details that you added to each one. And the light up tip is perfection!!!
Vintage Kitty says
Thanks Jocelyn! They are so much fun to play with! We still pull them out out to channel our inner magic!
Steph says
These are the best! My kids play with them for hours and hours. Thank you for getting them away from video games!
Courtney O'Dell says
These are such a fun craft – my kids love them!
Vintage Kitty says
I’m so glad your kids enjoyed this wand craft Courtney! Such a fun summer activity, right?
Eden says
These are so awesome! Can’t wait to make one! We’re huge Harry Potter fans :)
Vintage Kitty says
You’re going to have so much fun! Enjoy!