Our Victorian Storefront Gingerbread House brings the magic of a historic downtown to your house!
Download our gingerbread house template to make this cute toy store! It’s competition worthy but it’s boxy design makes construction simple. It’s a great way to get into the holiday spirit!
You might know from the name of the blog that I like old school charm. What you may not know is that I’m very into historic preservation. I’ve served on my town’s Historic Landmarks Commission as well as our Mainstreet organization so remembering to shop small, local businesses is very important to me.
When I decided to create a gingerbread house template for the blog, I thought that a quaint downtown shop would be fun to build plus I thought it would remind my readers of the joy that comes with visiting a historic downtown business district during the holiday season.
You know the downtowns… the street lamps are covered in garland and holiday lights, there’s a huge Christmas tree twinkling near the town hall and the stores invite you into their warmth with scents of cinnamon and spice. It’s the time of year when you might see a horse drawn carriage, carolers in 19th century costume and Santa’s jolly laugh is making all the kids BELIEVE!
It’s about community and spreading joy and there’s no place better to find that sense of wonder than a historic downtown filled with mom and pop shops. And so I’m going to shout this message from the top of my little gingerbread rooftop. Please #shopsmall this holiday season!!!!
I should have known better because years ago I tried to make gingerbread houses with my niece in one day and by the end of that day, they weren’t completed and I was bedraggled with exhaustion. So this Victorian Storefront Gingerbread House Template comes to you with lots of advice! It takes days to make a gingerbread house, but this way it’s more fun. You can spend a little time over a few days rather than one terribly long day where your pieces collapse because you haven’t let the icing dry properly. Learn from my mistakes!
The next step is shopping for all that candy. I bought most of my candy at the Dollar Tree because the prices can’t be beat. Buy more than you think you’ll need because when you are decorating you don’t want to run out! Leftover candy can be used for Christmas tree decorations or as stocking stuffers.
But my most important tip before you start this gingerbread house is to have fun making it! While you bake and decorate, listen to Christmas music and drink hot chocolate or for adults totally make yourself one of these Candied Cranberry Whiskey Smash cocktails. Get into the spirit and trust me your creativity will flow!
-Kitty
Victorian Storefront Gingerbread House
Ingredients
Gingerbread House Dough
- 1-1/2 cups sugar
- 1-1/2 cups molasses
- 4-1/2 teaspoons ground ginger
- 1 tablespoon ground allspice
- 1 tablespoon cinnamon
- 1 tablespoon ground clove
- 1-1/2 cups vegetable shortening
- 3 eggs , beaten
- 10-1/2 cups all-purpose flour
Royal Icing
- 6 egg whites
- 9-1/2 cups powdered sugar
- 1 teaspoon cream of tartar
Instructions
Geting ready
- Print out Victorian Storefront Gingerbread House Template
- Cut out template pieces and place them all in a large ziplock bag so you don't lose anything.
Baking your gingerbread house
- In a large dutch oven or heavy bottomed pot, combine sugar, molasses and spices.
- Bring to a gentle boil, stirring constantly until sugar has melted.
- Turn off the heat and stir in the shortening
- Once the shortening is mostly incorporated, add in the flour a little bit at a time.
- When you reach the point your arms are too tired to keep stirring in flour, transfer to a lightly oiled work surface ( I did this on my marble countertop) or to a very large bowl.
- Knead in the remaining flour and then make a well in the center of the dough.
- Add in a little bit of egg and knead until incorporated.
- Keep adding a little egg at a time until it's all incorporated and the dough is smooth.
- Separate the dough into 4 or 5 disks and wrap all but one in plastic wrap (but do not refrigerate).
- Roll out the first disk between two sheets of parchment paper to about 3/8th inch thickness.
- Lay your template over the dough and with a sharp knife, cut out the template.
- Using the parchment paper under the dough, transfer the gingerbread piece to a cookie sheet.
- If necessary, trim the parchment so it all fits on the cookie sheet, then place the dough in the refrigerator to chill, 30-60 minutes.
- Repeat the process above for your remaining gingerbread house pieces.
- If you have any gingerbread dough left over, wrap it tightly and refrigerate it in case you need it later.
- Once your pieces are cut and chilled, preheat your oven to 325F.
- Bake one or two cookie sheets at a time, baking until they are hard and the dough bounces back when your touch it lightly, about 12-20 minutes depending on the size.
- Cool cookies on the tray, transferring only once they have cooled completely.
- Let cookies dry out for a day or two before decorating for best results.
How to make royal icing
- In the bowl of a stand mixer, combine egg whites and cream of tartar.
- Whip egg whites until they form stiff peaks.
- Slowly sift powdered sugar into egg whites, mixing between additions.
- Once the icing is completed, cover with plastic wrap, pressing into the icing to keep it from hardening.
- To color, place some of the frosting in a bowl and add gel color and mix with a spoon.
- To pipe, place icing in a piping bag and place a rubber band on the end to keep the air out.
- Place the bag in a glass with a damp paper towel at the bottom to keep your pastry tip from clogging while you work. Store any icing you aren't using currently in the refrigerator.
Building your gingerbread house.
- Gather a bunch of canned food from your food pantry.
- Add icing to the seams of two side pieces and place them together, using the cans to hold the pieces in place.
- Make sure to smooth out any unwanted icing before it dries.
- Keep adding walls, until you four walls are glued together then let it dry until the royal icing is completely dry...about 12-24 hours.
- Meanwhile you can assemble or decorate smaller items to place inside your gingerbread house, things likes trees, wreaths, snowmen, and sandwich board
- Gather your decorations and organize them in a cupcake tin so you can easily grab them while you decorate.
- Cut small pieces of parchment to place under the decorations you're making so they're easy to move later. Remember that this stiff royal is like glue!
- Any decorations made with royal icing should be left to dry completely before moving around but make sure to add any sprinkles before it starts to set.
- Once the house walls are dry, decorate the outside of your gingerbread house.
- Place decorated figures inside your house and then glue on the roof.
- Ice the entire roof, making dangling icicles and scattering sanding sugar on top before the icing dries.
- Once the house is decorated, thin a little white royal icing by adding a 1/4 teaspoon of water at a time until it flows nicely. Spread it around the ground of the gingerbread house to make snow. This will also keep the house from sliding around when you move it.
- Place any outside decorations around your house while the royal icing is still wet.
- Give the entire piece a dusting of powdered sugar and step back to marvel at your creation!
Nutrition
Gingerbread House Tips
- Don’t expect to make this Victorian Storefront Gingerbread House is one day. We built this over several days, leaving plenty of drying time in between additions. It’s also more fun that way because it takes many hours to complete. A little over a few days is less tiring.
- You’ll need scissors, piping bags, piping tips, fine mesh sieve or sifter, offset spatula, rolling pin, parchment paper, sharp straight edge knives, and a mixer with whisk attachment.
- Have on hand a variety of decorations. We used jelly beans, starburst, taffy, ice cream cones, red hots, candy canes, jolly ranchers, sixlets, gumdrops, tootsie rolls, sprinkles, and decorating sugar. Much of this we purchased at the Dollar Tree to save money.
- It’s helpful to choose a color scheme for your house before you start. Having too many colors on a house can make it look messy rather than coordinated.
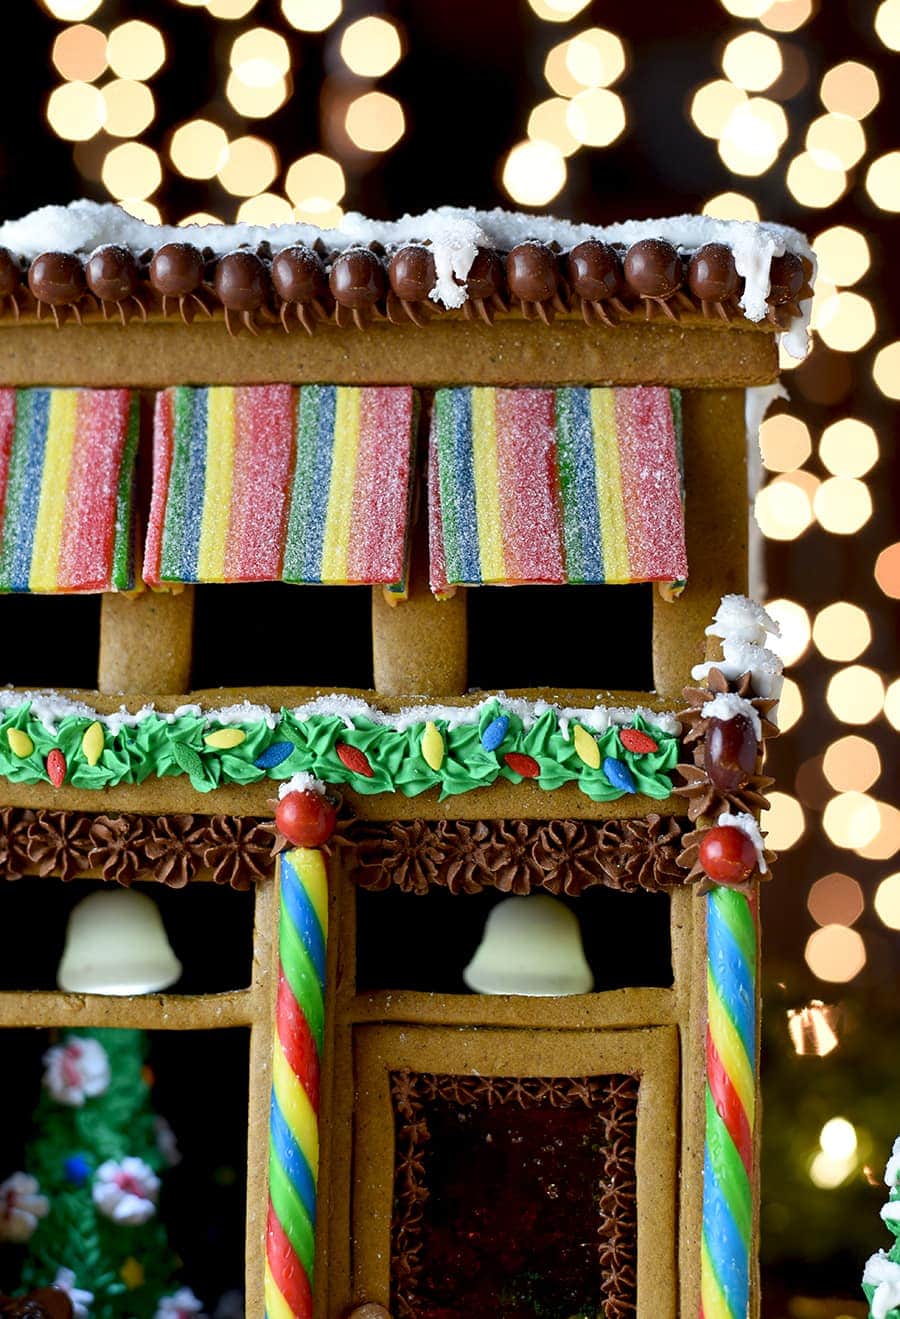
- The front of a storefront is always the most elaborate on a downtown building, so we decorated it while it could lie flat and then let it dry overnight. When assembling the house, we protected the front with bubble wrap so the cans wouldn’t break any of the decorations.
- We tinted our royal icing brown using Americolor’s chocolate brown gel so that the royal icing holding together the house wouldn’t be visible. We used this same color for decorative piping around the doors and windows. We also used Americolor gels for the green. This pack of gels is ideal to have any color on hand.
- The stained glass front door was made with melted jolly ranchers. I smashed them into little pieces, placed them in a plastic cookie cutter on a piece of parchment in a pyrex dish and melted the candy in the microwave. Let cool completely before trying to remove!
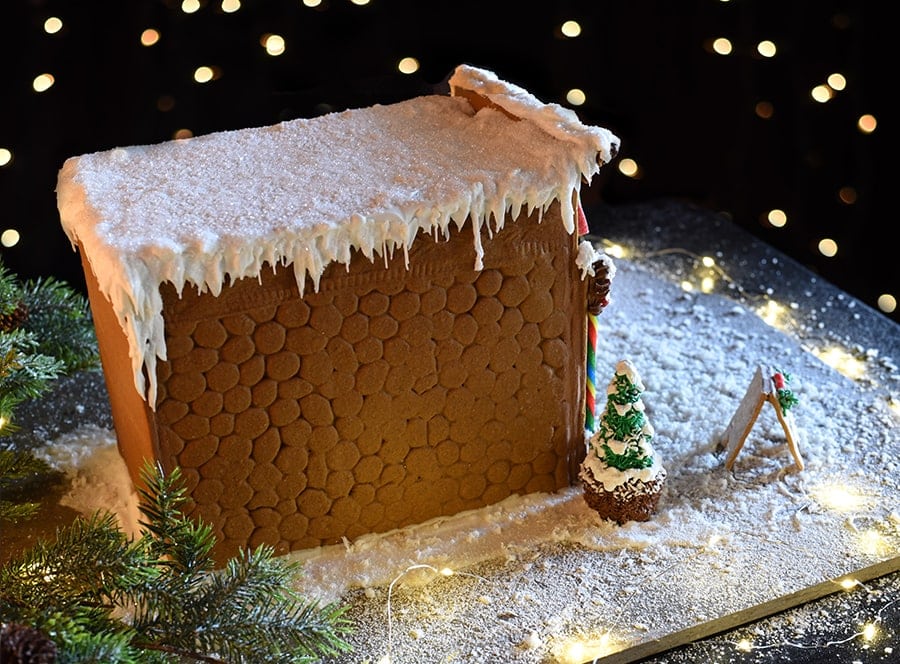
- For the sides of the building I used a textured mold that looks like stone. I couldn’t find the one I have online but this set will do the same thing.
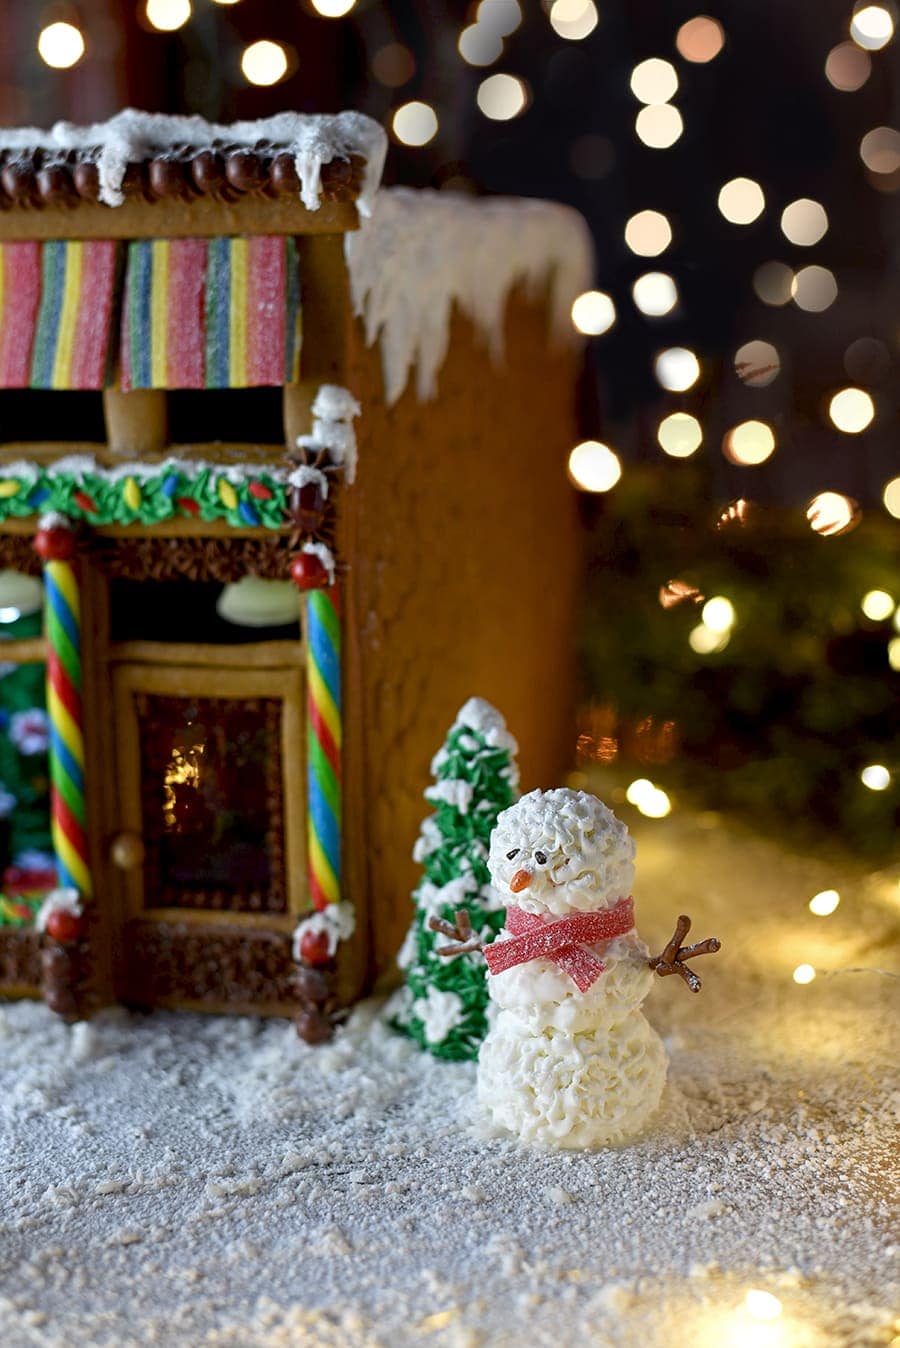
- The snowman is filled with rolled up starburst candies. I made three balls and piped each with a star tip. After they dried, I glued them together using more icing.
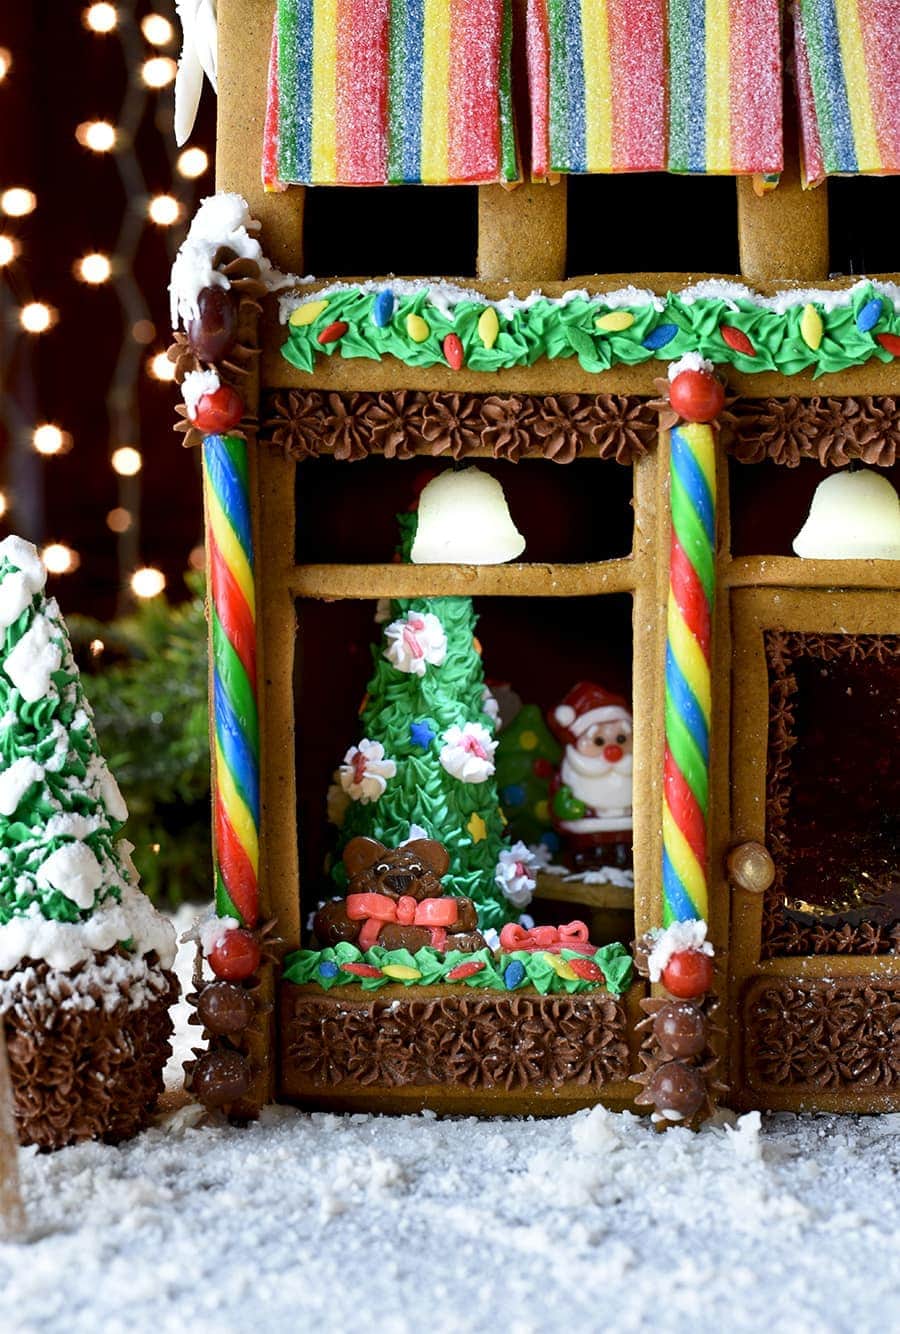
- The bear is sculpted from tootsie rolls.
- We lit the inside using the same led lights we used in our Harry Potter Wand Tutorial. The shades are bell shaped gumdrops. The switch and battery are hidden in the roof icing.
- The awnings were made with starbursts mashed together and rolled thinly. I then pasted on striped taffy with corn syrup and molded them on cardboard. Once they started to dry out, I took off the awning and backed it with royal icing to give it structure.
- I also used cardboard to hold the sandwich board while the royal icing dried.
- The trees were made with ice cream cones.
- Gaps and mishaps can be covered up with snow.
You might also like:

This Christmas Gnome Craft is a fun project for kids and adults! Use these paper gnomes as gift tags, Christmas ornaments or make into a holiday garland.

Bubbly hard cider, fresh pomegranate seeds and springs of rosemary come together to make a festive holiday drink. Let’s toast to the season!

This Gingerbread Granola is super easy to make and great for snacking, yogurt parfaits or as a thoughtful homemade gift. Gingery, sweet, crunchy, nutty and so good, you’ll want to eat this granola all year long!

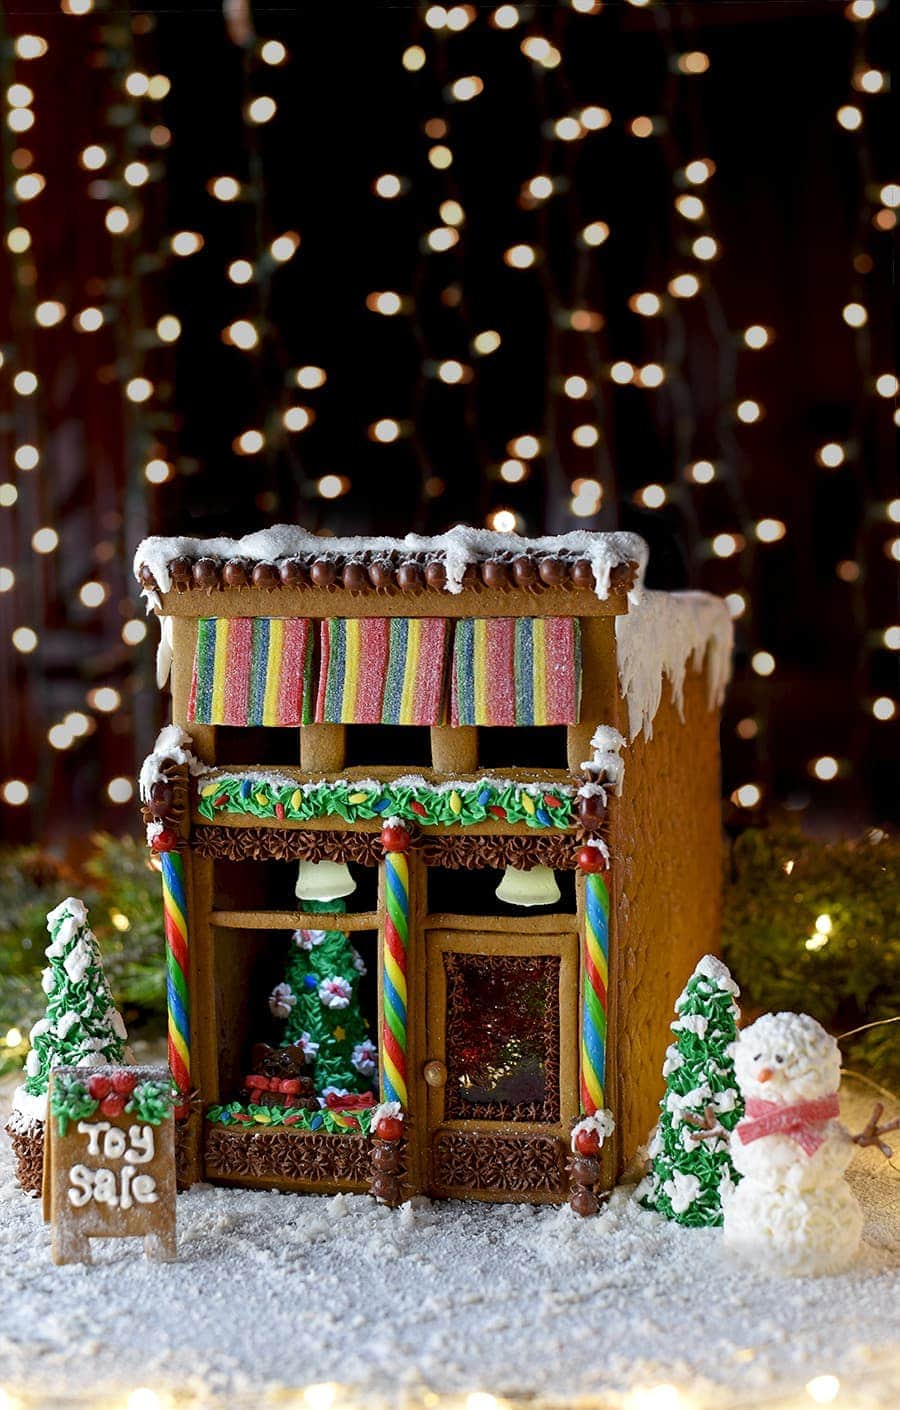

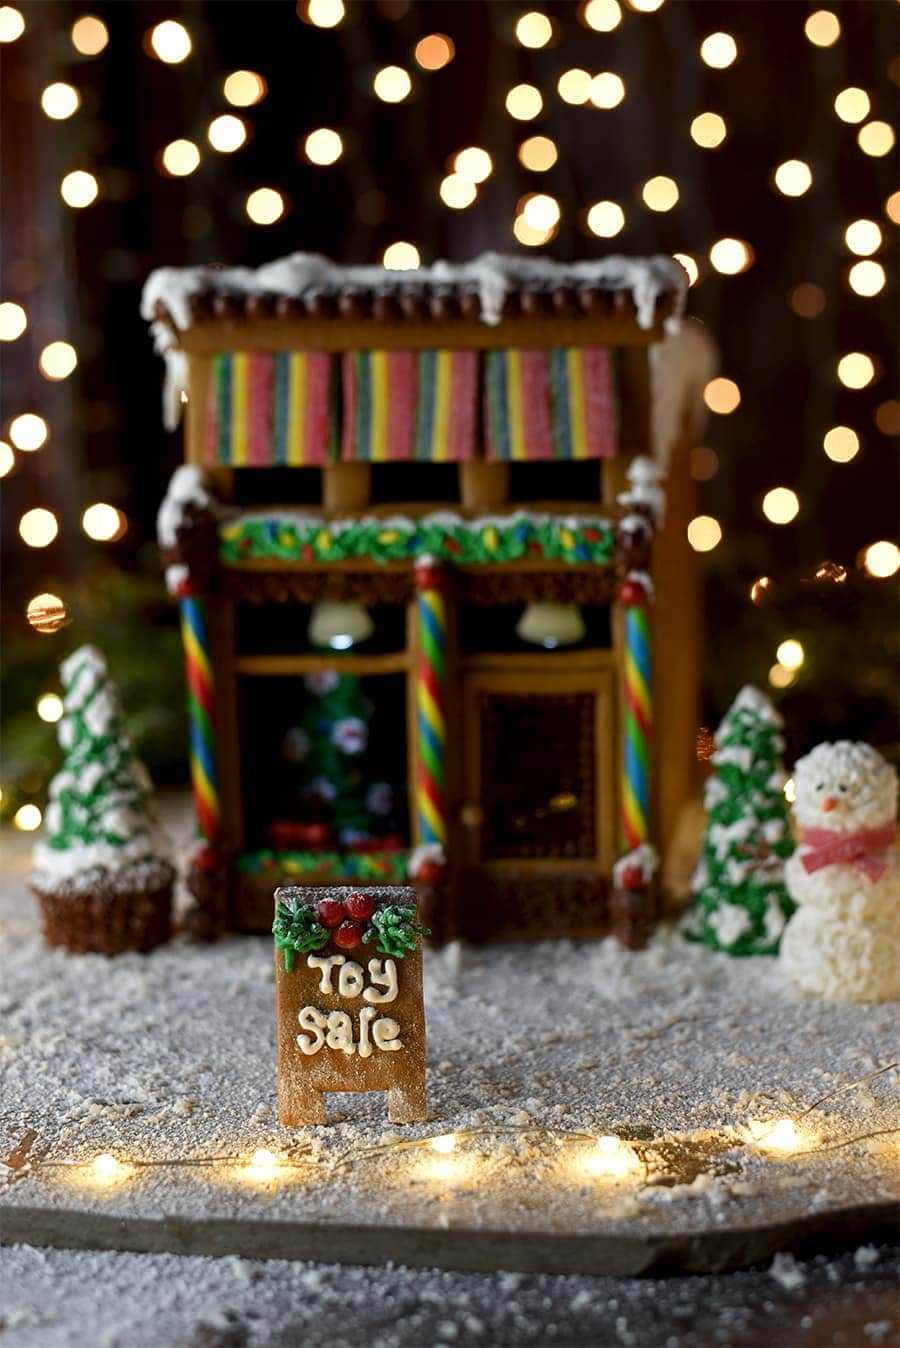

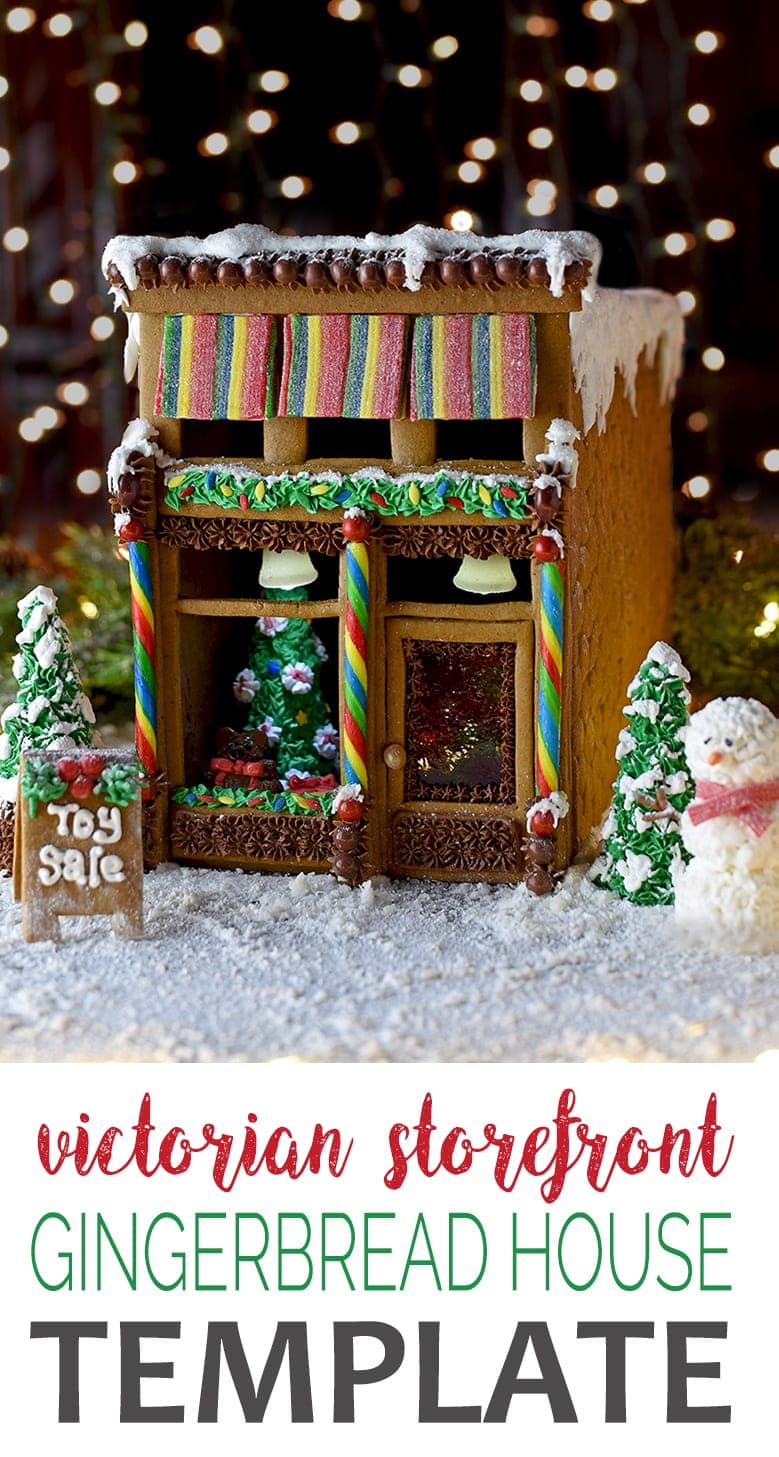 Our Victorian Storefront Gingerbread House brings the magic of a historic downtown to your house! Download our free template to make this cute toy store! It’s competition worthy but its boxy design makes construction simple. #gingerbreadhouse #holidayinspiration #Christmas #holidayrecipes

Little Swiss Baker says
This is stunning. What a cute gingerbread house. Love all the little details.
Vintage Kitty says
Thanks! It was a fun way to start the Christmas season!
Krissy Allori says
This out does all of the ginger bread houses I’ve made before! It’s so creative and cute!
Vintage Kitty says
It out did it for me too! But it was quite the holiday showpiece!
Kristen says
This is so adorable, I LOVE it! Can’t wait to try it this winter!
Kevin says
Thanks Kristen! Its a a blast to make. Post pictures when you get to building it. :-)
Emily Hill says
This Victorian gingerbread house is quite possibly the cutest gingerbread house I’ve ever seen!
Kevin says
Emily I’m glad you like it! I have a soft spot for Victorian architecture so had to try it out as a confection.
Susan Long says
I love this adorable gingerbread house and what fun to start out the season with a ‘toy shop’ to start the kiddos thinking of their wish lists. A very creative house that would make a great centerpiece for the holiday party. I love it.
Kevin says
I’m glad you like the idea! It was as much fun to make as it is to admire.
Charles says
I love that you took the time and effort to light the gingerbread house too. Such attention to detail. Love it.
Vintage Kitty says
Thanks Charles! I really think it adds a wow factor too. Glad you like it.
Michael Wurm Jr says
Are you kidding me with this!? Amazing!! Love it!!
xo Michael
Vintage Kitty says
Thanks Michael! xoxo
Drew says
Puts me in the holiday spirit
Vintage Kitty says
Check! My job’s done! Falalalala…
Priscilla says
Love this gingerbread house! All the detail is fantastic!
Vintage Kitty says
Thanks Pricilla! The detail was the fun part for sure!
Kathy says
The Santa in the window made my day! I really appreciate the careful and good humored instructions! Your creativity amazes me with every post!
Vintage Kitty says
Thanks Kathy! You have to be good humored to make a gingerbread house of any size. It takes so much patience!
Marsha says
Love this! It reminds me of my small town Christmases growing up. Details are charming.
Vintage Kitty says
That’s awesome Marsha! Me too! I’ve spent most of my life in quaint towns with mom and pop storefronts. Shopping local for the holiday always feels heartwarming.
Emily says
So cute and creative! I love the splash of color.
Vintage Kitty says
Thanks Emily! I love bright colors!
Ryan says
Your attention to detail is amazing and beautiful!
Vintage Kitty says
Thanks Ryan! Glad you like it. Its a blast to build too.
Sabrina says
WOW, just WOW!! I love all the detail in your house!! It looks absolutely amazing!
Vintage Kitty says
Thanks Sabrina!
LillyEPS says
Super cute design! I love your inspiration for the idea too. I’ve never made a gingerbread house, but this def makes me want to try!!
Vintage Kitty says
Thanks Lilly! You have to make a gingerbread house!!! They’re so much fun!
Anna says
Swoon! That is one gorgeous gingerbread house! And that snowman!! So adorable!
Vintage Kitty says
Thanks Anna!
Melissa says
What a gorgeous gingerbread house! I love all the little details! And love all the tips for making it.
Vintage Kitty says
Thanks Melissa. It was a blast to figure out all those little design features!
Dawn says
This is too cute for words! And I bet super fun to make!! Such a fun project on a Saturday before Christmas while enjoying some hot chocolate :)
Vintage Kitty says
Thanks Dawn! It was super fun. Hoping to have time to make a new one this year.
Lauren says
This is ADORABLE! I love the awnings. So, so cute.
Vintage Kitty says
Thanks Lauren!
Monica says
This is stunning, and I can definitely see why it was a labor of love! What an amazing project to tackle for the holidays – and to display!
Vintage Kitty says
Thanks Monica! I’m lucky that I have a blog so I can display it FOREVER!
Dana says
This is just the cutest! I’ve only made a gingerbread house once and it looked more like a house of horrors ;) Haha. I’ll definitely have to use this as guidance in the future!
Vintage Kitty says
Thanks Dana! There is a learning curve to gingerbread. My first one was abysmal! Sure hope you give it another go!
Lisa says
What a beautiful gingerbread house … love it! I’m going to give it a go this week. What size did you cut the roof? Did you leave any overhang on the walls?
Vintage Kitty says
That’s awesome Lisa! You’re right, I didn’t include a roof template. (I knew I saved the original templates for a reason!) The roof was 11 by 7 inches and did not include an overhang. With all the icing you shouldn’t need it any bigger. Make sure to print the PDF at 100% for those measurements. But for anyone making this larger or smaller the roof is the width of the side by the width of back. It leaves just a small gap between the roof and front facade for the switch for the led lights.
Alyssa Applegate says
hello! I am making this with my daughter and we are so excited. We cut out all the pieces and then realized there is no template for the roof, did I overlook it? Thanks!
Vintage Kitty says
I’m so sorry about that. I need to update the template to include it. PLease see the comment above yours for instructions. Please let me know how it goes Alyssa!
Carolina Garcia says
Very nice!!!!
Linda says
This was a fun challenge. The hardest part the making the gingerbread house from scratch. I didn’t have enough molasses, and my store was out, so I used dark corn syrup. Not sure if it matter, but by the time I was adding the 7th cup of flour it was just crumbling. So I added spritz of cold water to help mush it together. Not sure how good I really did but I was able to actually make a gingerbread house! Still working on decorating and putting together. This was for a gingerbread house contest at work, 🤞
Barbara McLean says
Thank you for sharing this detailed tutorial, template and recipe. This is greatly appreciated. I am going to try to follow your instructions and make a gift for a friend.